Old Fashioned Scuba Diver Costume Homemade
What might there exist at the bottom of the sea? Oceans galore for you to explore; a shipwreck's sunken treasure, a fearsome colossal squid, a stealthy submarine or a deep sea diver, out to explore the bounding main's floor.
This month's kids arts and crafts spot is an accommodation of how to create a unproblematic diver'due south helmet like this for clothes-ups and pretend play. Instead of material nosotros've used some like shooting fish in a barrel, attainable materials you might just have lying around at habitation when a certain little someone asks "what are we doing for arts and crafts today?"

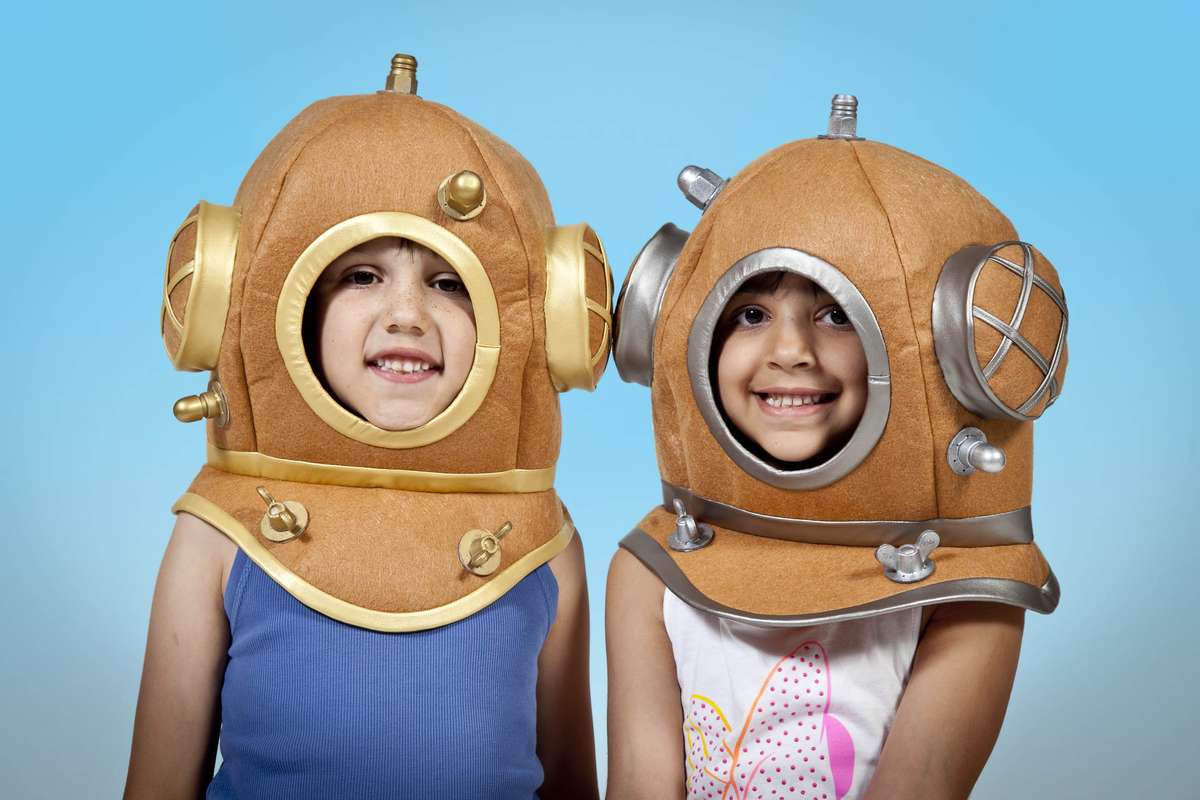
The finished diving helmet

Materials
- Cardboard box
- Stanley pocketknife (for grown-ups to exercise the cutting) or make do safe saw tool for kids
- Large (51 mm) newspaper binders
- Gold/statuary coloured contact paper (or yous could apply coloured paper and glue)
- Scissors
- Hole dial
- Gaff tape/cloth tape/masking tape
- Black marker
- A4 printouts of our diving helmet templates (Folio 1, Page 2, Folio 3)
Optional materials
- black/brown watercolour paint
- a spongey brush
- mucilage
- glitter or sequins if you want some extra sparkle

Step 1
Cut out all your diving helmet template shapes and trace them onto your cardboard.
HINT: We've made our helmet open at the back so information technology's easy to pop on and off for dress ups, nonetheless if y'all wanted to, you lot can make three more helmet sides (but without a face hole) and another helmet base of operations shape to add to the back to brand a full helmet.

Stride two
HINT: Grown upwards help required for this footstep!
Cutting out all your diving bell pieces with a Stanley knife or precipitous scissors. In addition to the design pieces you will need a strip of carte du jour (roughly 30-twoscore cm long and ii.5cm broad) for the diving helmet join slice.
If you lot have plenty of fourth dimension and patience y'all could likewise let the kids help with this step using a plastic box-cutting pocketknife or kids scissors.


Step 3
Use your hands to scrunch and bend the cardboard pieces all over then they are less stiff. This will brand it easier to form the curved helmet shape. Use the gaff tape to tape the pieces together from the within.
HINT: Use the side with your sketchy outlines or whatever sticky tape/marks every bit the inside so that your outside is smooth and easy to decorate.


Step iv
Create your raised window panes for the sides.
For each window pane, place the 4 window pieces of card together and pin with a paper fastener threaded through each cease like a sandwich toothpick.
Then use the newspaper fasteners to secure the windows to the helmet, bending the split pin ends from the inside.

Pace v
Now information technology's time to decorate! Cut out golden/statuary contact strips (or paper if that's what you are using) to make the cross hatching on the sides. Cover the helmet joiner, trim the helmet lesser and surround the face hole and windows.


S tep 6
You might like to pigsty punch the face hole and helmet join decorations to create a more textured outcome.
Add together all your decorative contact pieces to the helmet.


Y'all might fifty-fifty like to add together some actress basics, bolts or cogs made from any leftover scraps of bill of fare and contact and secured to the helmet with paper fasteners.
If you lot're dandy on sparkle, extra sequins or glitter can too be glued on hither.


Footstep seven
You lot could terminate decorating at present, yet, we thought our helmet needed a little something.
If you agree, use a bit of watercolour paint and a spongey brush all over to give your cardboard an antique-y bronze look.
Add together extra definition by outlining your gold trim with a blackness marker.

Step eight
Add a paper-thin ring to the dorsum that can be adjusted to head size with record or staples.
Make sure all your paper fastener ends are taped over on the inside and so that they don't scratch little faces.

And in that location it is. Suit up footling aquanauts, information technology's time to swoop!
0 Response to "Old Fashioned Scuba Diver Costume Homemade"
Post a Comment